Tag Archives: bread

Cinnamon Bread

Standard

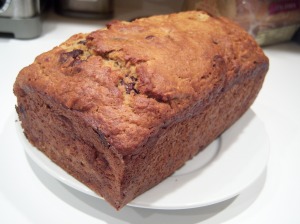
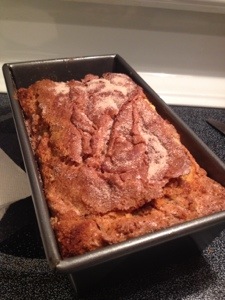
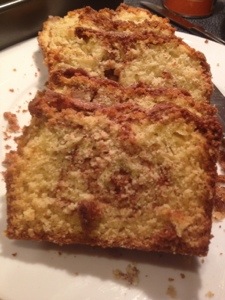
I have a problem with reading recipes all the way through before I make them. I repeatedly do this so who knows when I will learn. I can’t count how many times I am getting dinner together and then realize, shoot…that has to marinate for 2 hours, or oh no, the bread needs to rise. When I made the batter for this bread I thought it was an awful lot for one loaf, and it was…the recipe yields 2 loaves. When making something new I just don’t like to make a huge batch…what if we don’t like it? OR what if it just doesn’t turn out? The good news is this worked out for the best because this bread is delicious. It isn’t too sweet, but you still get a little of the cinnamon sugar mixture swirled through the loaf. I also saved a little of the sugar/cinnamon mix and sprinkled some on the top. This really was for Alex but I think I ended up eating just as much! The best part is that this is a no knead bread – just mix and bake! It freezes well, just slice and put in a freezer bag. Perfect for a treat for breakfast or a yummy snack!

cinnamon bread


Cinnamon Bread, from Redfly Creations
Ingredients:

1 cup butter, room temperature
2 cups sugar
2 eggs
2 cups buttermilk or 2 cups milk plus 2 tablespoons vinegar or lemon juice
4 cups flour
2 teaspoons baking soda
Cinnamon/sugar mixture:
2/3 cups sugar
2 teaspoons cinnamon
Directions:
Preheat oven to 350 degrees.
In a large bowl combine flour and baking soda and set aside. With a whisk, cream together the butter and sugar. Mix eggs in one at a time. Stir in milk. Gradually mix in flour mixture until just combined.
Pour about half of the batter into greased loaf pans (1/4 in each pan). Sprinkle about half of the sugar mixture over the batter, then cover with remaining batter. Sprinkle most of the sugar mixture over the tops of the batter. Run a butter knife through the batter to mix in the sugar and cinnamon. Sprinkle the remaining sugar mixture over the top of both loaves.
Bake for 45-50 minutes, or until a toothpick inserted into the middle of the loaf comes out clean. Let cool in the pan for at least 20 minutes before removing.


cinnamon bread

Apple Bread

Standard

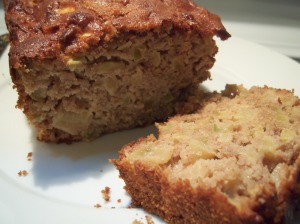
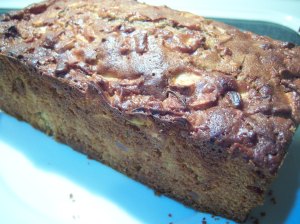
Gotta love quick breads – no waiting for a rise, no kneading, and still tastes delicious.  This was a nice change of pace.  I have made banana bread and pumpkin bread, but never bread with apples.  This bread smells like fall, my kitchen smelled just wonderful as it was baking.  I made just a couple of adjustments by using whole wheat pastry flour in place of all-purpose and also decreasing the sugar just a little.  I used one granny smith and two golden delicious apples, but you can use whatever apples you like best – I feel like these two bake pretty well.

Apple Bread, slightly adapted from Southern Pink Lemonade

3 apples cored and diced
1 1/2 cups whole wheat pastry flour
1 1/2 teaspoons ground cinnamon
1/2 teaspoon salt
1/2 teaspoon baking soda
1/2 teaspoon baking powder
3/4 cup of sugar
1/3 cup unsweetened applesauce
1/3 cup oil
2 eggs
1/2 teaspoon vanilla extract

Directions:

Preheat oven to 350 degrees F.  Grease 9X5 loaf pan.

In a small bowl mix together flour, cinnamon, baking powder, baking soda, and salt.  Set aside.

In a medium bowl beat together the applesauce, sugar, oil, eggs, and vanilla extract.  Mix until well combined, then slowly add in flour mixture.  Once combined, fold in apples and pour into loaf pan.

Bake in preheated oven for approximately 40-50 minutes, or until toothpick inserted in loaf comes out clean (I ended up baking my loaf about 60 minutes before done).  Let loaf cool in the pan for about 5 minutes, then remove and let finish cooling on wire rack.

I sliced about 12 slices.

Nutrition per 1/12 of recipe: 175.5 calories, 7.3g fat, 0.7g saturated fat, 30.8mg cholesterol, 181.5mg sodium, 27.2g carbohydrates, 2.3g fiber, 17g sugar, 2.2g protein

Cinnamon Raisin Bagels

Standard

A lot has happened since my last post, one thing being my baby shower taking place.  Thank you to my sister-in-law for hosting a beautiful shower, it was really nice seeing family and friends!  Check out some of the eats – everything was delicious!

And my personal favorite, the cupcake tower!  Which held amazing chocolate and strawberry cupcakes.

Now all I need is the baby – still waiting but evidently he should be making his debut any day now!  Even though I haven’t been posting, I have been cooking so hopefully I can get caught up soon!
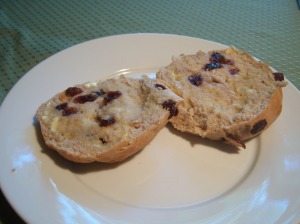

Bernie once told me eventually I am going to just come home from the grocery with just milk and flour.  While I am not really close to that yet, I am definitely broadening my horizons and expanding my cooking skills.  Bagels were on my “list of things to try.”  I started with cinnamon raisin since that is Bernie’s favorite.  These are a little labor intensive…like any yeast bread, but once you get going and have the dough done, it is really not so bad.  Just a forewarning – this can be a 2-day process.  The original poster made her bagels in one day though – which is what I did too, and they turned out just fine.  Check out the original post from Smitten Kitchen for pictures that look a whole heck of a lot better than mine – and that cover the whole process.

Cinnamon Raisin Bagels, from Smitten Kitchen

Sponge
1 teaspoon instant yeast
4 cups unbleached high-gluten or bread flour
2 1/2 cups water, room temperature

Dough
1 teaspoon instant yeast
3 3/4 cups unbleached high-gluten or bread flour
1 tablespoon ground cinnamon
5 tablespoons sugar
2 3/4 teaspoons salt
2 teaspoons malt powder or 1 tablespoon dark or light malt syrup, honey, or brown sugar
2 cups loosely packed raisins, rinsed with warm water

To Finish
1 tablespoon baking soda
Cornmeal or semolina flour for dusting

Directions

1. Day one:

For the sponge: stir the yeast into the flour in a 4-quart mixing bowl. Add the water, whisking or stirring only until it forms a smooth, sticky batter (like pancake batter). Cover the bowl with plastic wrap and leave at room temperature for approximately 2 hours, or until the mixture becomes very foamy and bubbly. It should swell to nearly double in size and collapse when the bowl is tapped on the countertop.

2. To make the dough – in the same mixing bowl (or in the bowl of an electric mixer), add the additional yeast to the sponge and stir. Next, add 3 cups of flour, cinnamon, sugar, salt and brown sugar. Stir (or mix on low-speed with the dough hook) until the ingredients form a ball, slowly working in the remaining 3/4 cup flour to stiffen the dough. In the last two minutes of mixing, stir in the raisins.

3. Transfer the dough to the counter and knead for at least 10 minutes (or for 6 minutes by machine). The dough should be firm, stiffer than French bread dough, but still pliable and smooth. Everything should be well combined and hydrated.  If the dough seems too dry and rips, add a few drops of water and continue kneading. If the dough seems tacky or sticky, add more flour to achieve the stiffness required. The kneaded dough should feel satiny and pliable but not be tacky.

4. Immediately divide the dough into 12 pieces for super sized bagels, 16 regular-sized bagels (which is what I did), or 24 mini bagels. Form pieces into rolls.

5. Cover the rolls with a damp towel and allow them to rest for approximately 20 minutes.

6. Line 2 sheet pans with baking parchment and mist lightly with nonstick spray.  Poke a hole in a ball of bagel dough and gently rotate your thumb around the inside of the hole to widen it to approximately 2 1/2 inches in diameter for a supersized bagel, two inches for a large one or just slightly more than one inch for a miniature. Try to make the dough as evenly stretched as possible.

7. Place each of the shaped pieces two inches apart on the pans. Mist the bagels very lightly with the spray oil and slip each pan into a food-grade plastic bag, or cover loosely with plastic wrap. Let the pans sit at room temperature for about 20 minutes.

8. Check to see if the bagels are ready to be retarded in the refrigerator by using the “float test”. Fill a small bowl with cool or room-temperature water. The bagels are ready when they float within 10 seconds of being dropped into the water. Take one bagel and test it.

**If it floats, immediately return the tester bagel to the pan, pat it dry, cover the pan and place in refrigerator.  If you want to finish the bagels same day, leave in fridge for about 3-4 hours.   Or, leave them in overnight – up to 2 days.

** If the bagel does not float, return it to the pan (at room temperature), checking back every 10 to 20 minutes or so until a tester floats. The time needed to accomplish the float will vary, depending on the ambient temperature and the stiffness of the dough.

9. When ready to bake the bagels (several hours later or next day), preheat the oven to 500°F with the two racks set in the middle of the oven. Bring a large pot of water to a boil (the wider the pot the better), and add the baking soda. Have a slotted spoon or skimmer nearby.

10. Remove the bagels from the refrigerator and gently drop them into the water, boiling only as many as comfortably fit (they should float within 10 seconds). After 1 minute, flip them over and boil for another minute. If you like very chewy bagels, you can extend the boiling to 2 minutes per side. While the bagels are boiling, sprinkle the same parchment-lined sheet pans with cornmeal or semolina flour. (If you decide to replace the paper, be sure to spray the new paper lightly with spray oil to prevent the bagels from sticking to the surface.)

11. When all the bagels have been boiled, place the pans on two middle shelves in the oven. Bake for approximately five minutes, then rotate the pans, switching shelves and giving the pans a 180-degree rotation. (If you are baking only one pan, keep it on the center shelf but still rotate 180 degrees.) After the rotation, lower the oven setting to 450°F and continue baking for about 5 minutes, or until the bagels turn light golden brown. You may bake them darker if you prefer.

12. Remove the pans from the oven and let the bagels cool on a rack for 15 minutes or longer before serving.

Yields:  16 “regular” sized bagels

Nutrition per bagel:  299 calories, 0.7g fat, 0.1g saturated fats, 0mg cholesterol, 640 mg sodium, 66.9g carbohydrates, 2.5g fiber, 16.9g sugar, 6.9g protein
Crusty French Bread

Standard

Making bread used to really intimidate me, but now I really enjoy it.  It is very satisfying to taste something delicious after you have spent hours making it.  Bernie thought this bread was perfect, so I will definitely be making it again.

Crusty French Bread, from Allrecipes

Ingredients

6 cups all-purpose flour
2 1/2 (.25 ounce) packages active dry yeast
1 1/2 teaspoons salt
2 cups warm water (110 degrees F/45 degrees C)
1 tablespoon cornmeal
1 egg white
1 tablespoon water

Directions

  1. In a large bowl, combine 2 cups flour, yeast and salt. Stir in 2 cups warm water, and beat until well blended using a stand mixer with a dough hook attachment. Using a wooden spoon, stir in as much of the remaining flour as you can.
  2. On a lightly floured surface, knead in enough flour to make a stiff dough that is smooth and elastic. Knead for about 8 to 10 minutes total. Shape into a ball. Place dough in a greased bowl, and turn once. Cover, and let rise in a warm place until doubled.
  3. Punch dough down, and divide in half. Turn out onto a lightly floured surface. Cover, and let rest for 10 minutes. Roll each half into large rectangle. Roll up, starting from a long side. Moisten edge with water and seal. Taper ends.
  4. Grease a large baking sheet. Sprinkle with cornmeal. Place loaves, seam side down, on the prepared baking sheet. Lightly beat the egg white with 1 tablespoon of water, and brush on. Cover with a damp cloth. Let rise until nearly doubled, 35 to 40 minutes.
  5. With a very sharp knife, make 3 or 4 diagonal cuts about 1/4 inch deep across top of each loaf. Bake in a preheated 375 degrees F (190 degrees C) oven for 20 minutes. Brush again with egg white mixture. Bake for an additional 15 to 20 minutes, or until bread tests done. If necessary, cover loosely with foil to prevent over browning. Remove from baking sheet, and cool on a wire rack.

Yields 2 loaves of bread – 15 pieces per loaf

Nutrition per serving:  calories: 94, 0.3g fat, 0mg cholesterol, 119 mg sodium, 19.5g carobhydrates, 0.8g dietary fiber, 2.9g protein

Banana-Chocolate Bread

Standard

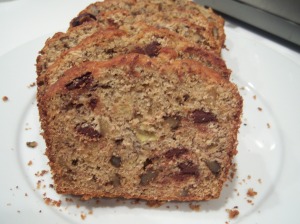
If you like banana bread and chocolate, you will like this bread.  It tastes like Best Banana Bread, only sweeter.

Banana-Chocolate Bread, from Baking Illustrated

Ingredients
2 cups unbleached all-purpose flour, plus more for dusting the pan
1 1/4 cups walnuts, chopped course
10 tablespoons sugar
3/4 teaspoon baking soda
1/2 teaspoon salt
3 very ripe, soft, darkly speckled large bananas, mashed well
1/4 cup plain yogurt – non-fat
2 large eggs, 2/3 cups egg substitute
6 tablespoons unsalted butter Smart Balance butter blend, melted and cooled
1 teaspoon vanilla extract
1/2 cup (heaping) bittersweet chocolate, grated

Instructions

1. Adjust oven rack to lower middle position and heat oven to 350 degrees. Grease bottom only of regular loaf pan, or grease and flour bottom and sides of nonstick 9-by-5-by-3-inch loaf pan; set aside. Combine first five ingredients plus chocolate together in large bowl; set aside.

2. Mix mashed bananas, yogurt, egg whites, butter, and vanilla with wooden spoon in medium bowl. Lightly fold banana mixture into dry ingredients with rubber spatula until just combined and batter looks thick and chunky. Scrape batter into prepared loaf pan; bake until loaf is golden brown and toothpick inserted in center comes out clean, about 55 minutes. Cool in pan for 5 minutes, then transfer to wire rack. Serve warm or at room temperature.

Yield: 1 loaf

Nutrition per servings (of 16 slices): 234.3 calories, 11.6g fat, 2.6g saturated fat, 0.1mg cholesterol, 188.2 mg sodium, 30.1g carbohydrates, 1.9g fiber, 14.3g sugars, 4.7g protein